Résumé
Description
1. Attaches passives ou d'ancrage
Ces attaches sont placées sur les dents qui ne se déplacent pas et qui ne sont là que pour empêcher l'aligneur de se détacher, généralement parce que le mouvement sur les autres dents aurait un impact sur la stabilité de la gouttière.
L'exemple typique est une intrusion dans le secteur antérieur. Vous ne voulez pas que les dents postérieures bougent, mais attendez-vous à une force réactionnaire dans le secteur postérieur qui ne serait pas assise par les aligneurs.
Comme les attaches ne sont pas là pour transmettre une force, la forme et le positionnement sont relativement peu importants.
Voici une photo de celui que j'ai utilisé pour l'intrusion dans le dernier cas que j'ai montré. J'utilise une attache en forme de boîte.
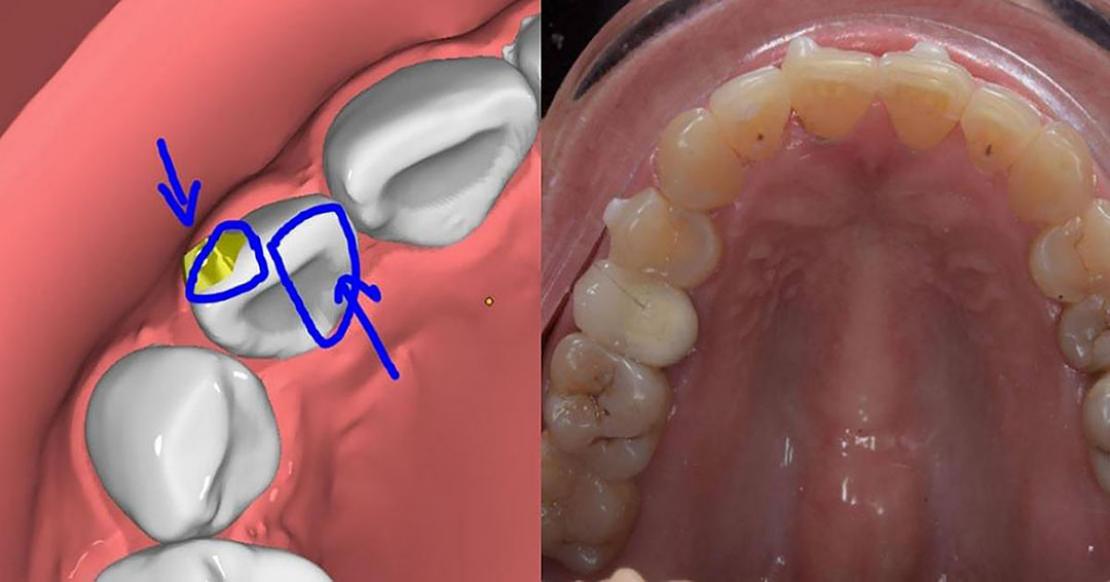
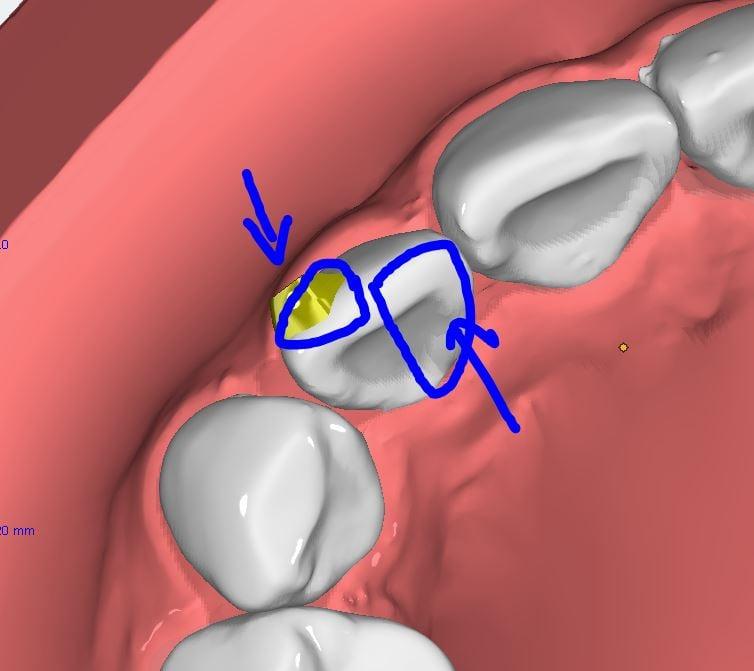
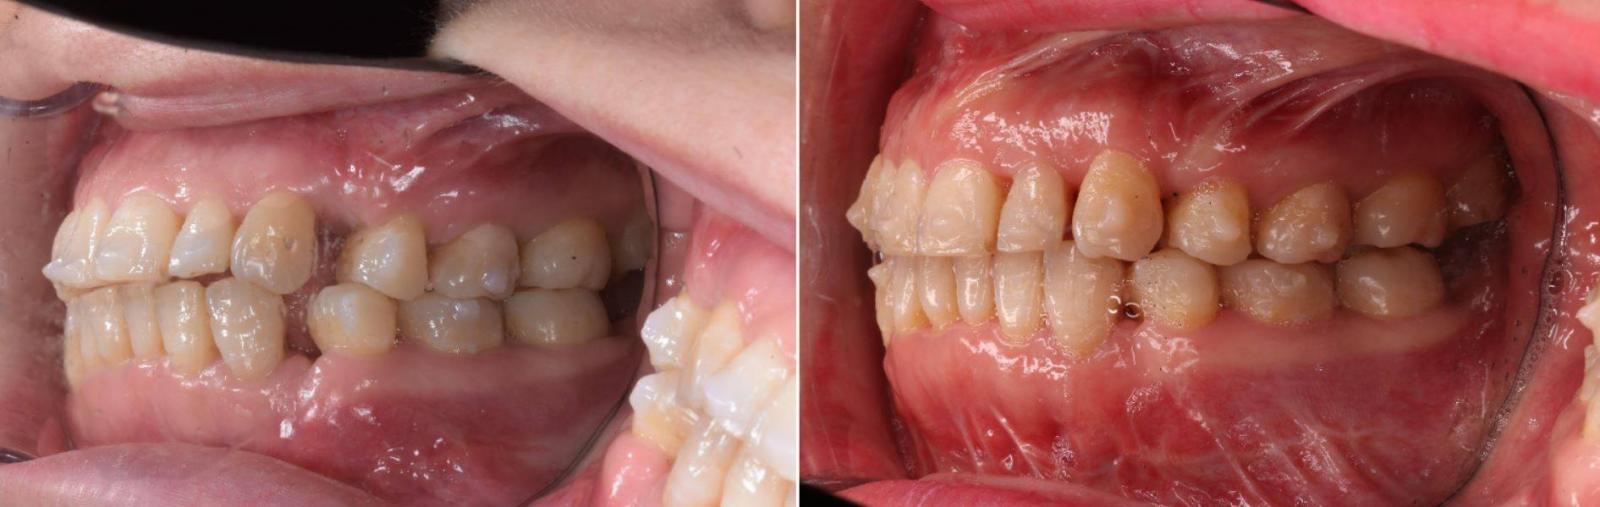
2. Attaches d'assise
Ces attaches ne sont pas là pour transmettre activement une force mais pour garder dans la gouttière une dent qui pourrait en sortir lors de son déplacement.
Le parfait exemple est la rotation d'une incisive latérale. L'attache ne sert pas à augmenter la surface totale, car le plastique peut faire tourner la dent. L'attache ne change pas le système de force, mais elle garde les dents à hauteur dans le plastique assurant que la force sera transmise tout au long du mouvement.
La forme est importante, car elle doit aider le plastique à monter sur la dent. D'habitude, je vais faire une pente à 45°. Le positionnement n'est pas si important mais j'aime le mettre près du bord où le plastique est plus rigide.
Des photos d'incisives latérales pour illustrer.
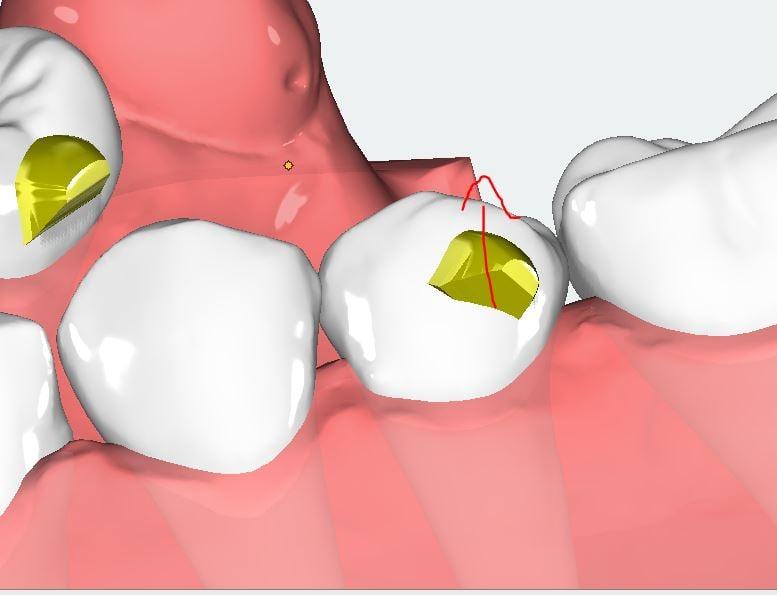
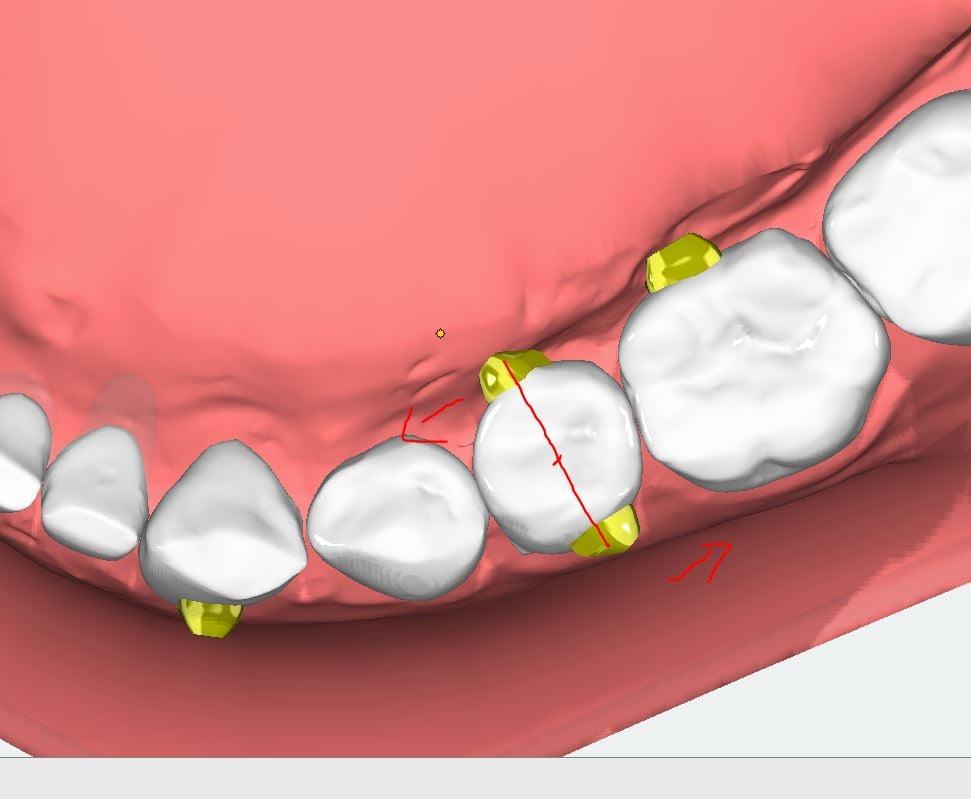
3. Attaches actives
Ces attaches créent une surface active pour déplacer activement une dent. Vous les utilisez généralement dans des situations où l'anatomie ne crée pas une surface active naturelle.
Ici, la forme et le positionnement seront importants car ils détermineront votre mécanique.
Illustration avec une prémolaire. Je veux la faire tourner donc je place deux attachements aussi loin que possible l'un que l'autre et avec la surface active dans la direction opposée pour créer un moment. Comme je veux l'extruder j'ai orienté la surface pour créer une composante verticale.
Logiciel utilisé : Onyxceph
-------------------------
1. Passive attachment
Those attachments are placed on teeth that are not moving and are only there to prevent the aligner from unseating usually because movement on other teeth would have an impact. The typical example is an intrusion in the anterior sector. You do not want the posterior teeth to move but expect a reactionary force in the posterior sector that would unseat the aligners.
As the attachments are not there to transmit a force, the shape and positioning are relatively unimportant. Here is a picture of the one I used for the intrusion. I use boxed shaped one.
2. Sitting attachment
Those attachments are not there to actively transmit a force but to keep in the tray a tooth that you expect can move out of it. The perfect example is the rotation of a lateral incisor. By putting an attachment you do not increase the total surface the plastic will have to rotate the tooth = the attachment does not change the force system. But the attachment keeps the teeth in the plastic assuring that the force will be transmitted.
The shape is important, as it has to help the plastic fit onto the tooth. I usually go for a 45° slop.
The positioning is not that important but I like to put it near the edge where the plastic is more rigid.
Pictures of lateral incisors to illustrate.
3. Active attachment
Those attachments are creating an active surface to actively move a tooth. You usually use them in situations where the anatomy does not create a natural active surface.
Here both the shape and positioning will be important as they will determine your mechanic.
Illustration with a premolar. I want to rotate it so I place two attachments as far away from each other as possible and with the active surface in the opposite direction to create a moment. As I want to extrude I oriented the surface to create a vertical component.
Used software : Onyxceph
Images complémentaires


commentaires membres
écrire un commentaire